Showing posts with label cricut. Show all posts

Monday, February 28, 2011

Take Me the Way I Am

Got a LO done this morning, YAY!!! It seems like it has been forever since I've done a LO. Some pages can take me a couple days to hassle over because I do a little, come back, do a little more, come back, etc. And with a process like that I don't get too many LOs done. May need to revamp that style, not working so well.

So maybe hoping this page will get some scrapbooking juices flowing again.

I used some inspiration from my Creating Keepsakes magazine to make a LO using song lyrics. Loved that idea and it wasn't hard for me at all to pick a song. Have always loved "The Way I Am" by Ingrid Michaelson. It always reminds me of my husband and myself, we love each other and will do anything for each other no matter what.

Thanks for stopping by!!
Supplies:
cardstock - Papertrey Ink
patterned paper - BasicGrey, October Afternoon (grid)
stamps - Stampin' Up!
rubons - American Crafts
chipboard hearts - Colorbox
border punches - EK Success, Martha Stewart
Cricut cartridges - Paper Lace, Straight From the Nest

Thursday, October 7, 2010

So Cute

Hi everyone! I just had to pop in and share this LO that was totally inspired by Kelly Purkey and her first sketch in the Sketchbook 2 download. I don't ever download classes but when I saw that Kelly was offering the Sketchbook 2 class on her blog again, I just couldn't pass it up. Boy, was that the best decision I have made in a long time. I just know now that I will be patiently waiting for her next class to be offered because I am hooked now.

I have to say, this is a pretty simply LO, but I just love it to pieces. And it works perfectly for my vacation album. None of my pages in there are too time consuming, otherwise I would lose the motivation to complete it. I can't wait to use more of her sketches to help me finish this project.


Supplies:
cardstock, button, ric rac die - Papertrey Ink
patterned paper, cloud die cut, journaling card - October Afternoon (Road Map)
pen - American Crafts
letter stamps - Stampin' Up!
die cut machine - Cricut by Provocraft (Graphically Speaking cartridge - "cute" letters); Epic Six by Quickutz
ink - Tsukineko
border punch - EK Success

Thursday, August 26, 2010

Embellishmag.com Color Challenge

Hi everyone. It has been way too long since I have done a color challenge. This summer seemed to be full of everything and I didn't get a lot of the challenges done that I wanted to. But, when I saw that Lawn Fawn was sponsoring this color challenge, I just had to make the time to play along.

The theme is so perfect for this challenge sponsored by Lawn Fawn: quirky-cutesy-clean. All the words that describe them and their stamps. Who doesn't like quirky and cutesy. :o)


Glad I got a chance to play along and hop on over to embellishmagazine.com and check out all the entries so far, they are amazing.
Supplies:
cardstock - PTI
stamps - Lawn Fawn
hearts - Cricut cartridge Graphically Speaking
border die - PTI
felt - PTI
embossing folder - Quickutz
ink - Tsukineko
corner rounder - EK Success

Wednesday, August 11, 2010

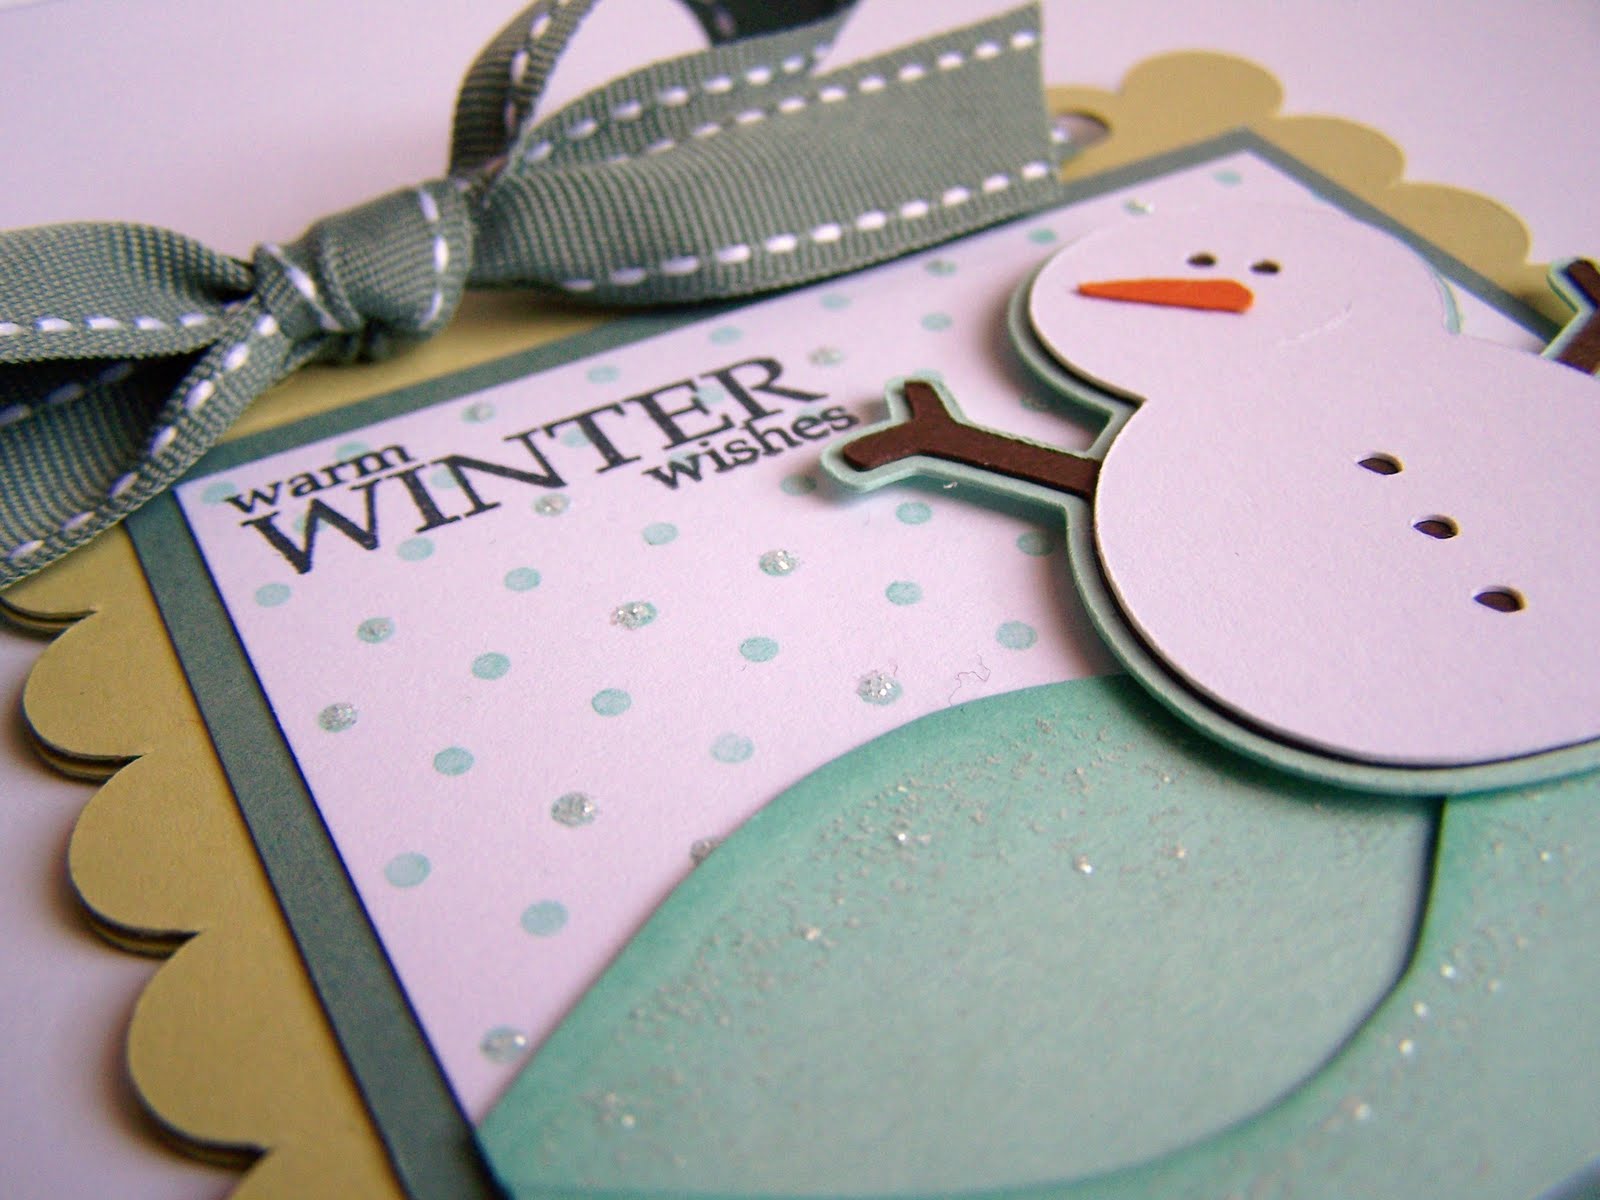
Warm Winter Wishes

Ahhh, just the sound of winter makes me cool off. After a long, cold winter I was so ready for summertime, but after these last consecutive days of heat indices over 100, I am ready for winter again. So funny.

Hopefully this card will help cool you off as well. I made this card for a recent submission call, but it wasn't picked up. I still love it though. It has cuteness written all over it.


When I think of winter, I think of snowmen. And as I was browsing through my Cricut Cartridges, this snowman from the DoodleCharms cartridge won my heart. He is just so cute and simple. For my card, I put him on a glittered snowy hillside out in the falling snow, also speckled with glitter.

Also, I created my card using the Storybook cartridge and I cut out two scalloped squares and adhered them together up top and tied it with ribbon for extra sturdiness.
Supplies:
cardstock, ribbon, stamps (polka dots, sentiment) - Papertrey Ink
Ink - Papertrey Ink, Tsukineko (black)
glitter glue - Ranger
die cut machine - Cricut by Provo Crafts (DoodleCharms, Storybook cartridges)

Tuesday, March 30, 2010

Birthday Party Invites

Hi everyone. Sorry for the absence, we have been gone some and I haven't had a chance to post since last Monday. But I am back with you today with three cards for ya. I was asked to make some birthday invites for my niece and so I made three different ones and thought it would be fun for her to pick her favorite. And here is her number one choice (the card below). And secretly, it was my favorite one too. She has good taste. :o)

I used one of my favorite companies to make this card, Cosmo Cricket. I love their new paper line, Garden Variety. So full of yummy goodness. The stamped image is from Stampin' Up! and I just paper pieced the frosted top to that cupcake. And of course it can't go unnoticed one of the best border punches ever, the loops edger punch by Martha Stewart.


My son picked this one as his favorite. The colors really pop off the card on this one. The stamps I used are from Hero Arts titled Elephants. I love that big elephant in that set, so easy to cut out and looks really cute too stamped on patterned paper if you want to spice it up a bit. And of course in true Julie fashion, I had to use another one of my favorite border punches by EK Success, the large embossed scalloped.


Here is the last card I made and I did another one of my loves, embossing. I love my embossing folders, they give just a touch of interest to a card without being distracting. The stamps I used for this card are also from Hero Arts, love that galaxy of stars stamp set by them.

Thanks for stopping by and I hope you have a great week!!!
Supplies:
Card 1
cardstock - Papertrey Ink, Stampin' Up!
stamps - Stampin Up! (cupcake), Cosmo Cricket (sentiment)
patterned paper - Cosmo Cricket
punches - Creative Memories (circle, square), EK Success (scalloped circle), Martha Stewart (loopy border)
die - Spellbinders
ink - Tsukineko, Papertrey Ink
Card 2
cardstock - Papertrey Ink, Stampin' Up!
stamps - Hero Arts
punches - Creative Memories (circle), Stampin Up! (small scallop border), EK Success (large embossed scallop border)
glitter glue - Ranger
ink - Tsukineko
die cut - Cricut cartridge Home Accents (sun)
Card 3
cardstock - Papertrey Ink, Stampin' Up!
stamps - Hero Arts
embossing folders - Cuttlebug
twine - Papertrey Ink
border punch - EK Success
ink - Tsukineko

Friday, March 12, 2010

My Lil' Fish

I figured it has been a while since I posted a scrapbook page so here you are. I made this one at the beginning of January. I go in spurts sometimes with my scrapbooking. If I feel the desire to make a page or two I go for it and get as much done as I can. But I don't push it if I don't feel like making a page because I will sit there literally for hours just trying to make it all work. I can make cards under pressure, but a lot harder for me to "make" myself do a scrapbook page. I used to only make scrapbook pages when I first started crafting and now look at me. I make one or less in a week now. Crazy. I still love to scrapbook but for now the small size of a card is appealing to me.

I love these little fish and I can't get enough of my Everyday Paper Dolls Cricut cartridge. It has everything in there. If you don't have the cart, you would be shocked at all you can create with it. One of my favs and my kids' because they like to make their own little people to play with.


Supplies:
cardstock - Stampin Up!, Papertrey Ink, Bazzill Basics Paper
patterned paper, date journal tag - October Afternoon
letter stickers - American Crafts
journaling sheet, rubon letters - Making Memories
gems - Hero Arts
border punches - EK Success
fish - Cricut by Provo Craft (Everyday Paper Dolls Cartridge)

Tuesday, February 2, 2010

WISH Tag

I had made this tag for a submission request for a magazine, but it wasn't picked up so I am sharing it here with you today. I'm not one to make tags but I have to say it was a lot of fun. When you have such a small area to work with, you pretty much can't fail at making a tag look nice. Before I made this tag I had just bought the Stamping Solutions Cricut Cartridge and I fell in love the butterfly and wish sentiment, they just fit perfectly on this card.
And what is a girly card without a little glitter. I just had to spruce up that butterfly and so I added some stickles to it and around the circle. And for the sentiment, I really wanted to use white on white and to help it stand out more I embossed it with my Cuttlebug embossing folder. Love the end result and hope to use this tag on a gift for a really special little girl very soon.

Supplies:
cardstock,button, twine, ribbon - Papertrey Ink
glitter - Stickles
embossing folder - Cuttlebug
die machine - Cricut
cartridge - Stamping Solutions

Sunday, January 24, 2010

U ROCK!

Hi all, I hope you are having a fun weekend! I just thought I would pop by with a card for you. I have been really loving my Cricut lately and every now and then I will flip through the booklets that come with each cartridge just to maybe spark some ideas for me. And when I flipped through my Graphically Speaking cartridge book I found this fire image that intrigued me and as I continued on with my search I found the guitar image on my Stamping Solutions cartridge and that was all I needed for some inspiration.


Everything else just kind of fell into place from there, the colors, the design, and THIS sentiment from Papertrey Ink. I think this could be a great card for a teen. I only wish now after seeing the card posted here that I should have done more to bling up the guitar a little, it looks a little plain jane to me, but I can always go back and add something to it before I send it to someone. What do you think, what could I add to the guitar to make it be more appealing to the eye? Or I even thought too that I could add a little glitter around the top edges of the fire to help make the card stand out a little more. Decisions, decisions.
Supplies:
card stock, patterned paper, stamp, ink - Papertrey Ink
marker - Creative Memories
border punch - Fiskars
die cut machine - Cricut
cartridges - Graphically Speaking, Stamping Solutions

Monday, January 4, 2010

Girly, You Rock!


Another new year and a new decade is upon us. I hope your 2009 was wonderful and that 2010 is even better. Everyone deserves to be happy so I wish all of you tons up happiness for the year to come.

So to go along with the theme of happiness, here is a cheery card for you. I just love the colors in this card, they are bright, fun and happy. I have been on a kick lately with butterflies and when I was shopping at Michaels a few weeks back, I came across this sizzix butterfly die and I had to have it especially when it was 40% off. What a deal and a great purchase because this baby will get some good use.
Hope you all have a fabulous week and that you are kicking 2010 off to a good start.
Supplies:
cardstock - Papertrey Ink
stamps - Hero Arts (polka dots), Papertrey Ink (sentiment)
ribbon - Cosmo Cricket
gems - Hero Arts
butterfly die cut - Sizzix die
border punch - Martha Stewart
scalloped circle - Cricut Stamping Cartridge
ink - Papertrey Ink, Tsukineko

Thursday, December 10, 2009

Raspberry Suite Color Challenge #20


Yay, another fun round of color challenges by Dawn McVey. And can I say that I am totally in love with these colors. I love warm colors and the colors Dawn picked for her challenge are the true definition of warm. The aquamist color adds so much appeal that it is sure to be a standout color on any card that is posted to this challenge. I can't wait to see what everyone comes up with.
Supplies:
cardstock, patterned paper, ribbon, stamps - PTI
border punches - Martha Stewart, EKSuccess
tea cup die cut - Cricut Stamped Cartridge
ink - Tsukineko

Monday, June 29, 2009

Your A Game


In honor of Jordan's birthday yesterday, I thought I would post a LO of him and his good grades. Jordan has always been a great student and always works hard for his grades. I just wanted to finally put that accomplishment on paper or actually on a LO. I never have to help him study for a test or help him with any of his homework. He does it all by himself and actually gets most of his work done in school, it was rare he brought any homework home. Just very proud of him.
Supplies:
cardstock - Bazzill Basics Paper
patterned paper - Jenni Bowlin (large diecut paper), October afternoon (apple paper, striped paper on tree), BasicGrey (red paper)
chipboard tree - Maya Road
ink - Signo Uniball (white), American Crafts (black)
cricut - Making the Grade cartridge (A), George and Basic Shapes (rest of title)

Sunday, May 10, 2009

Raspberry Suite Color Challenge #5


Hi all. Here is another card for Dawn's color challenges. It was a little bit tricky this week for me because I don't use a lot of gray and I don't usually put two similar colors together like the pinks for this week's challenge. So, thanks for putting my mind to work Dawn, I needed it. I just hope I have come up with a card that it to the likings of everyone.

And this card is also different for me because I didn't use any stamping. I did the whole card with my cricut and a border punch from Fiskars. I used the storybook cricut cartridge for the birthday girl sentiment and for the curvy labels.

Supplies:
cardstock - Stampin Up! (light pink), Bazzill (gray and white), American Crafts (dark pink)
ribbon - Robert Stanley Collection
gems - Hero Arts

Thursday, May 7, 2009

Kristina Werner Color Inspiration #51


Hi! I have another card for you for color inspiration #51. I love the look of these colors together. I think they go good for preteen and teen girls. They are bold and beautiful colors and it shouts girl power to me. :) And because of that, I made this card with a special girl in mind who has a birthday coming up.

The butterfly on this card was done by heat embossing in white on brown cardstock and then I went back and filled in the hearts on the butterfly with cinnamon stickles to make them shine and sparkle. Every girl loves a little sparkle, right? The card itself was cut out with my Cricut using the storybook cartridge. Love all the different shapes in that cartridge, a must have for scrapbookers or cardmakers.

Supplies:
cardstock - Stampin Up!
stamps - Hero Arts
embossing powder - Hero Arts
glitter - Stickles
ink - Memento
pen - Signo Uniball

Sunday, April 26, 2009

My Boy


To go along with my last post, this is a scrapbook page I created for the Hero Arts my message challenge. If you remember, we had to custom make our own messages using a variety of Hero Arts sentiments or make our own sayings using their letter stamps. I chose again to use a variety of their sentiment stamps to create my one of a kind journaling. I didn't win anything with this page, but was very proud of it. I had a blast making this page and loved working with the bold colors. To me, those colors describe Gavin's personality. He is a rambunctious, go getter kind of kid and the scallops that border around the picture displays his softer side because because he is so affectionate and loving.
Supplies:
cardstock - Stampin Up!
stamps - Hero Arts
letter stickers - American Crafts
border punch - Fiskars
ink - Memento
thread - DMC
other - Cricut cartridge Doodlecharms for ladybugs

Thursday, March 19, 2009

6th Grade

I knew I was forgetting to post a LO for you. I wanted to post this a few days after I posted Zach's school LO but I guess it slipped my mind. Anyway, here is Jordan's school LO. It is pretty simple but I still fuss and fret over everything that I put on my pages. So this page probably looks like it took only a half an hour or so, it really took over an hour, maybe even close to an hour and a half to fully complete. I love having my Cricut machine, it cut out the number 6 and the title for me. All I have to do is press a few buttons and it does all the work for me. Gotta love that!! I didn't do any journaling on the page, instead I listed all of his supplies for the school year. Much simpler for me and I like to go back and see how the lists change over the years.

Products used: CS - Bazzill, PP - BasicGrey, Pen - Zig, Cricut cartridge - Making the Grade & Teardrop, Glitter - Making Memories, Chipboard - ?

Sunday, March 1, 2009

3rd Grade


Here is a LO of Zach's first day of 3rd grade. I know that was back in August, but I just couldn't think of anything for his page. After you do umpteen zillion back to school layouts you lose a little creativity. When I lose fresh ideas for pages I like to turn to my Cricut diecut machine. I look over the cartidges I have to get some idea of what I would like on my page. And the funny thing is, I don't think I have put apples on any of my back to school pages yet. So there you go, an idea is formed. I paper pieced these apples. In case you don't know what that means, I first diecut the apple border in green, then in red and then in brown and after that is done, I cut the pieces how I like them and assemble them. Green was my background color, then I adhered the brown stems and finally I adhered the red apples. This way I show all the colors of the apple instead of cutting this apple border out in just one color (boring). For a little shine, I put some stickles glitter glue in the corners to make the apples look clean. Yum, appetizing. The LO turned out really simple, but I don't think it needs any more. And the list I wrote on the LO is the supply list for Zach's school year.

Products used: CS - Bazzill, PP - Sassafras & October Afternoon, Pen - Zig, Cricut Cartridge - Makin the Grade and Teardrop, Glitter glue - Stickles, Letter Stickers - ? (from Target $ spot)

Wednesday, February 25, 2009

Thank You Card

This card came about because I had a vision in my head of colors I wanted to use on a card. And the colors that popped out in my head were a dark, rich blue and orange. I used the blue for the card base and then added hints of orange in my patterned paper background and in the flower I stamped. I didn't want an overwhelming amount of orange, just enough to make the blue more vibrant. I'm not sure why I chose this to be a thank you card, but the greeting seemed to fit well in the chipboard oval I wanted to use. I am always thankful for many things, so I'm sure this card will be used. :)

Products used: CS - Stampin Up, PP - BasicGrey, Stamps - Hero Arts, Ink - Colorbox, Decorative Brad - Making Memories, Photo corners - Heidi Swapp, Ribbon - Robert Stanley Collection, Scalloped Frame - Cricut Storybook diecut

Monday, January 26, 2009

Heart Card


Here is a card I created for the same challenge that I put Gavin's scrapbook page in. We just had to use at least one heart stamp to do the project. I love this card, the size of it just makes it so cute. It is only 4 inches in diameter but it still packs a good punch. It would be so much fun to receive something like this on Valentine's Day.

Products used: CS - Bazzill, Punch - Fiskars, Ink - Memento, Stamps - Hero Arts, Brads - Making memories, Flowers - Prima, Ribbon - ? Note: I used the Storybook Cricut cartridge to make the yellow scalloped circle.